If you’re a professional photographer, you’re probably juggling a lot. Keeping track of multiple clients, all at different stages of their experience with you, is a huge undertaking! I’ve tried so many different ways of managing my photography workflow over the years, but the one that’s been working best for me lately is Trello. I wanted to share with you today how this inexpensive tool can totally organize your client management and photography workflow in 2024. Read on for how I’m using Trello in my photography workflow.

CRMs Versus Trello For Photography Workflow Management
CRMs, or Customer Relationship Management systems, are incredible tools for capturing leads, managing contracts and invoices, automating processes, and tracking a client’s journey over time. In the last decade, CRMs have become a major “must-have” for so many photographers to help them stay organized. I’ve tried so many–Honeybook, Dubsado, ShootQ…SO MANY. And I’ve learned one thing about myself from all those trials: I like SIMPLE! Those systems are all wonderful. They are incredibly powerful and can manage so much data for you. But…when I looked at what my business needs were, I was primarily looking for a client tracking system. What I truly needed was something to remind me when I needed to consult with a client in the planning stages before their session on wardrobe or location. Something to remind me to touch base with clients the night before a session. That’s where Trello saved me.
Trello Lists for Your Photography Workflow
Trello has a visual board for you: think of it like your desk. On that desk, you can create lists. Each list? You can organize cards on it. For client workflow management, I divided my workflow into four overarching lists: Inquiry, Planning, Post Session, Production. These generally describe the broad stage that a client is in at any given time, from the moment they inquire through to delivery and review.
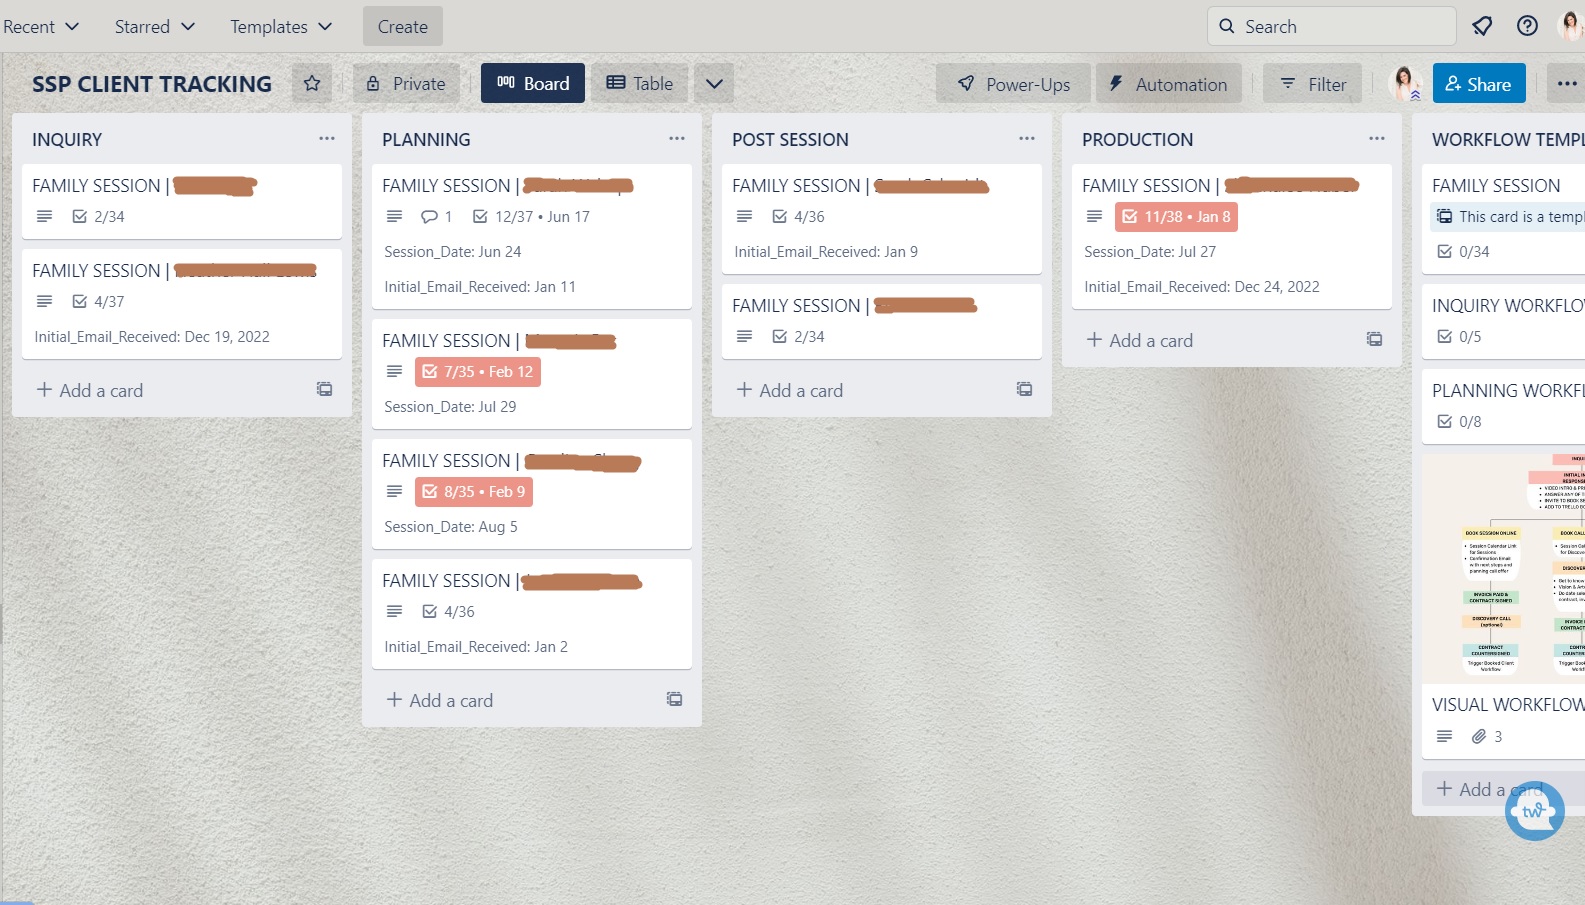
I love this because it’s super easy to see at a glance who is where in their journey. The names are blocked out for this post, but under each of those lines is the client’s name, so it’s quick to see who is where. If you’re a visual person, Trello is the perfect system for you.
Trello Cards to Track Individual Client Journeys
In the screenshot above, I have several cards stacked on each list. Each client gets their own card, and everything related to their experience goes on that card, and the card moves from list to list as the client progresses. For example, I can see that there are four clients currently in the “planning” stage with me. Once we’ve completed their session and I’ve checked the box that it’s done, the card automatically goes to the Post-Session list. When you click on one of those cards, it looks like this:
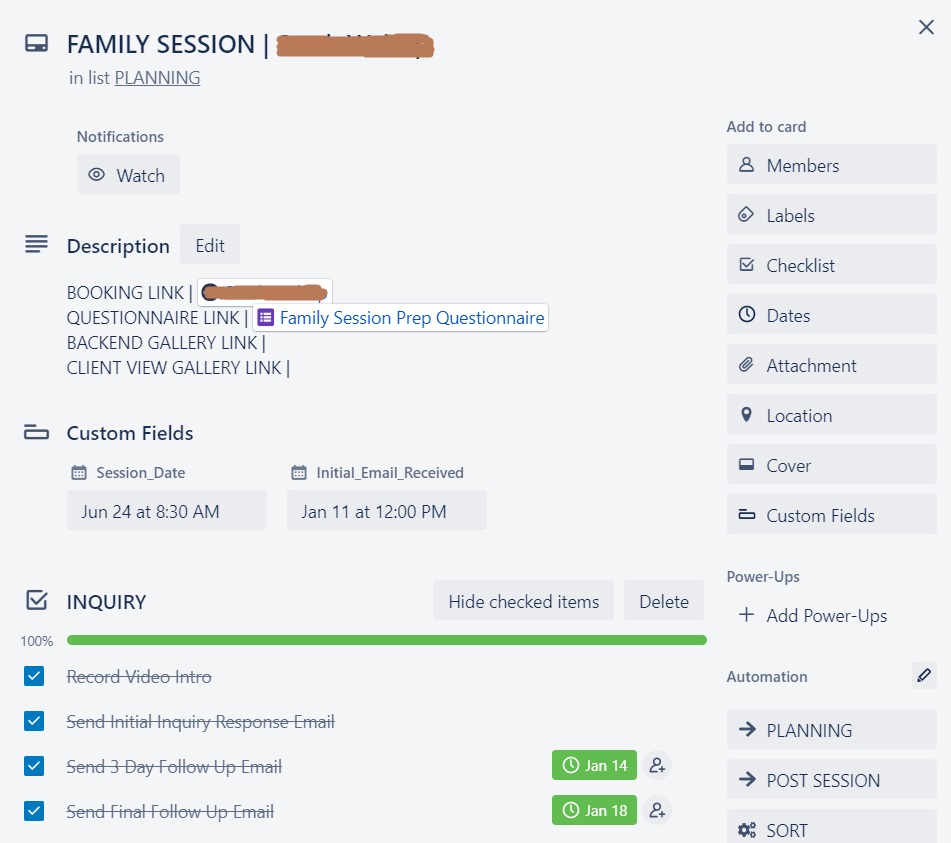
Here are the important parts of the card, from top to bottom:
- Type of session followed by the client’s name
- Description: I leave space for all of the client’s links: their booking link so I can access their contract and invoice, their questionnaire, and later, their gallery links
- Custom Fields: I set up space for Inquiry Date and Session Date so that I can use automation (more on this in a minute)
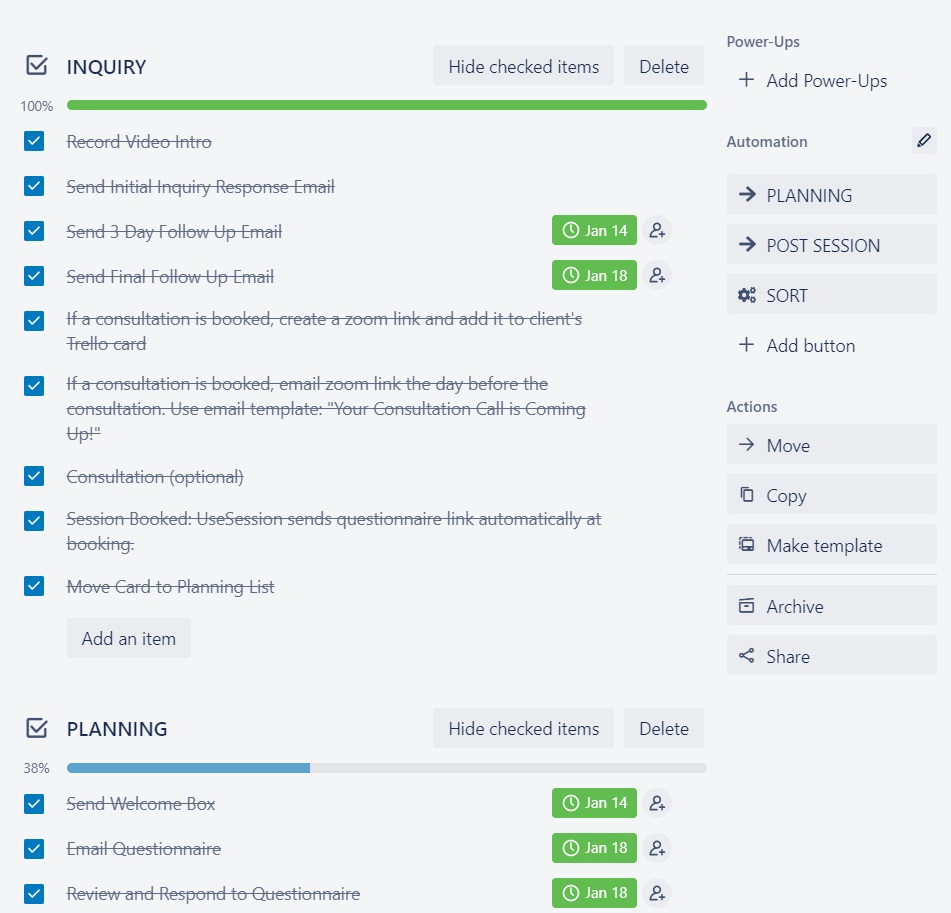
- Card Checklist: There is a checklist for each stage of the workflow
As I complete parts of the workflow, I can check them off, going down the card’s checklist.
3 Card Features To Use In Your Photography Workflow Board
1. Card Checklists
My actual step-by-step workflow appears in the checklist feature of a Trello card. It’s organized into sections that go right along with each list, but the whole checklist appears on each card. As I complete things, I can check them off, so it’s always easy to see what’s next.
2. Card Templates
To avoid having to write the same checklists over and over each time I have a new inquiry, I use a template. I created one card to look exactly the way I wanted to: the spaces for links in the description, each checklist, and all the items on each checklist that doesn’t necessarily have a set date it has to be accomplished on (I use automation rules for those!). Once it looked the way I wanted, I just clicked the “Make Template” button on the right hand sidebar of the card. Now, whenever I have a new client, I go to the template card and click the blue “Create Card From Template” button and fill in the client’s name.
3. Card Automations
This is where the real magic of Trello happens! Some of these automations get into paid features of Trello, but I’ve found them affordable when compared with similar CRM workflow tools.
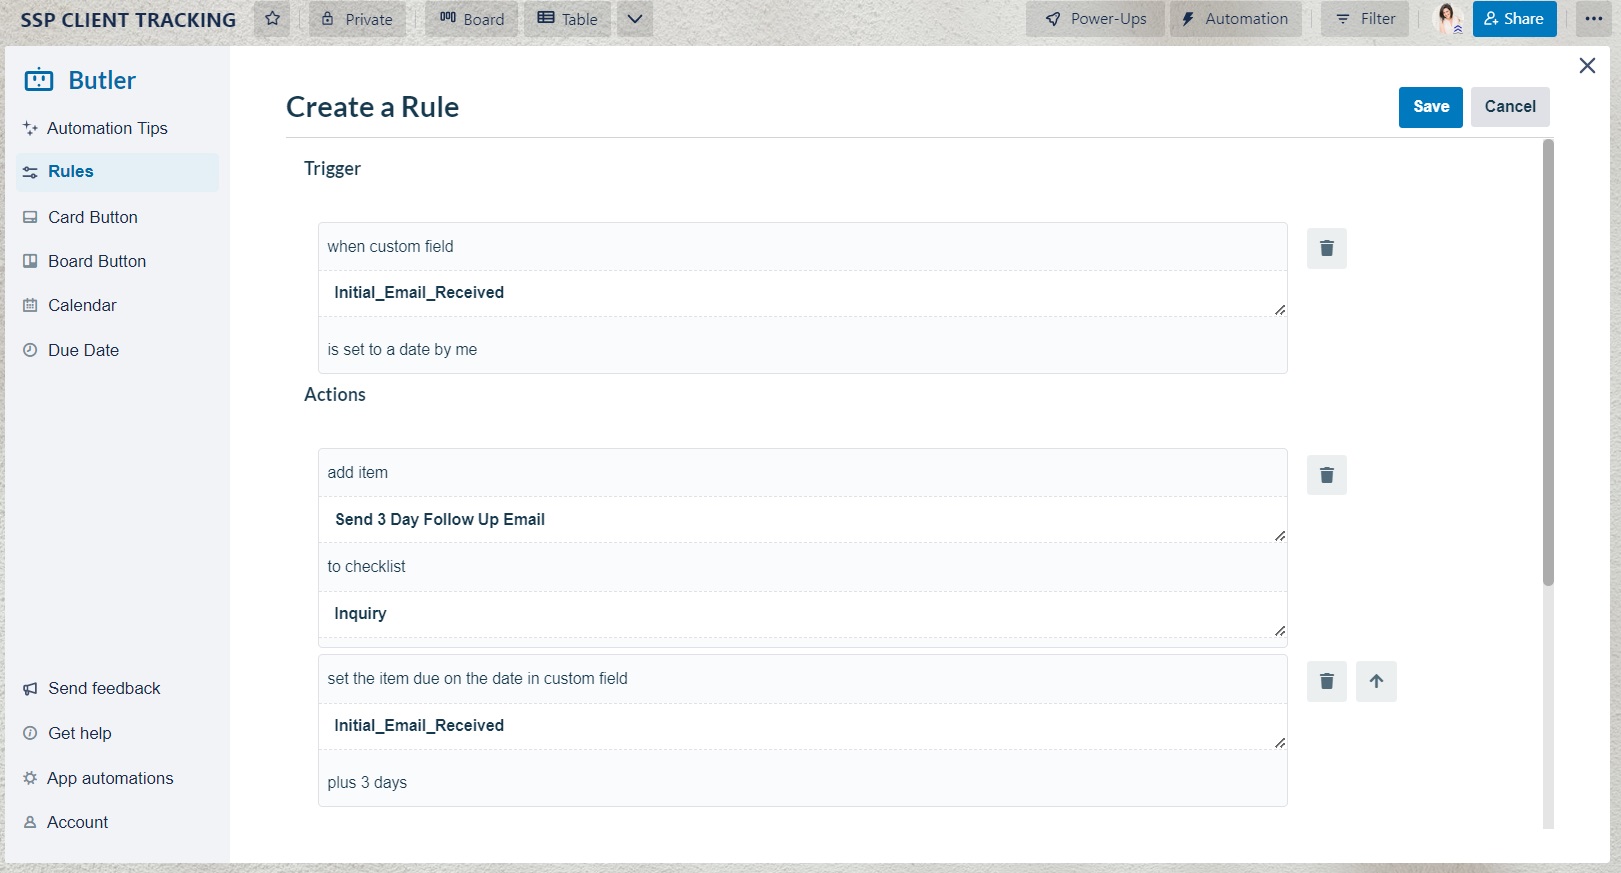
So: for any checklist item that needs a due date assigned based on either the inquiry date (like: 3 days after inquiry, remind me to send a follow up email) or the session date (like: 1 day before session, remind me to text the client), I use an automation rule rather than having it already typed into my card template. Then, when I tell Trello what the inquiry and session dates are, it automatically calculates the due dates and makes those tasks show up on the checklist.
How to Set Up Automatic Due Dates in Trello
There are two things you need to do to have Trello automatically create due dates based on a session or inquiry date: set custom fields, then set an automation rule for each item you want to have due dates created for.
- Set a custom field for Session Date or Inquiry Date. These are the primary dates you’ll use to start your checklists off with due dates. For instance, I want a reminder to send a follow-up email to inquiries 3 days after their inquiry date. To do that, I’ll need to tell Trello what the Inquiry Date was. The link above will walk you through how to set up a Custom Field.
- Set up an Automation Rule. There’s no limit to how you can set up automation rules, but to get due dates for specific checklist items, here’s how I’ve set up my rules. I do this for each Item I want to have auto populate a date.
Loved This Info on Photography Workflow with Trello?
If you’re a photographer and looking for more help with your business, I’ve created a list of my favorite tools, books, and resources for photographers here. You can also browse through my past photography business blog posts here! And if this helped you, drop a note in the comments–I’d love to hear from you.
If this post was helpful for you, save it for later by pinning the image below: